

|
|
|
|
 |

|
 |
BMW Garage | BMW Meets | Register | Today's Posts | Search |
 |

|
BMW 3-Series (E90 E92) Forum
>
Question about part number for cowl seal
|
 |
| 11-17-2015, 03:19 PM | #1 |
|
Captain
 266
Rep 952
Posts |
Question about part number for cowl seal
I bought my e90 used and it appears the prior owner had the windshield replaced. I have more wind noise at freeway speeds than I think I should and I believe the cowl trim seal is not seating correctly against the windshield.
The seal is pressed against the glass along most of the middle of the windshield, but there is an 1/8" gap between the cowl seal and the glass near the edge of the windshield on both the passenger and drivers side. This gap is probably about 6-10" long. I have tried pushing down on the trim to see if a clip under the trim is just not holding. I can feel a clip catching, but it won't hold the seal all the way down, it just pops back up again. I haven't tried removing this trim piece yet to see if the clip is there, or broken, or whatever, but that is probably a next step. Two questions I hoping other users can help out with: 1) What's the right part number if this trim piece is broken and I need to replace it? Realoem shows 51717180743. However when I look up this part on various sites, it often says only years 07-09. I have a 2011 and want to get the right part. 2) Is there a DIY on this site to replace this trim piece. I've found some posts about other users doing this replacement, but no DIY. Thanks.
__________________
bone stock
|
| 11-18-2015, 12:00 AM | #2 |
|
Colonel
 1007
Rep 2,108
Posts |
What you really need is 51137133292:
http://www.realoem.com/bmw/enUS/part...92&series=E90N Or with pictures on ECS https://www.ecstuning.com/ES78180/ In the below picture, consider the windshield is to the right. This is pushed up to the edge of the windshield in that position. The bottom of windshield goes into the top grove of this piece. Note there is an applied black bead of glue in that grove. Its pressure sensitive glue, comes that way from factory. This glues to the windshield. The cowl piece has a protrusion on its bottom, that gets pushed into the lower side grove, which would be towards front and top of the car of this piece. In the picture this bottom grove is already filled with a blank piece. This is how it comes shipped as protection to keep its shape during shipment. You need to peel this blank piece from there and discard. Otherwise you won't be able to push the cowl on to this grove which works like a clip, since it will be already filled. 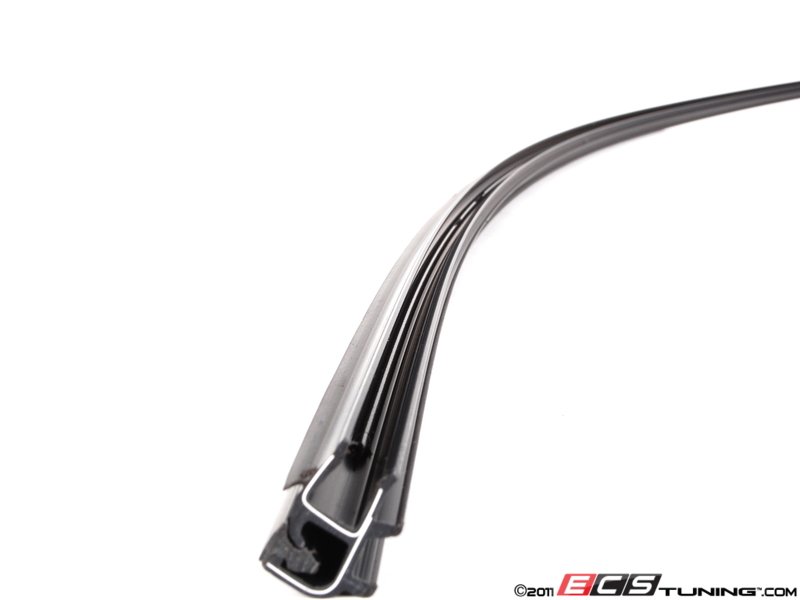 A very similar trim piece goes on the back window glass bottom too. It also tends to peel of from each side by age. But there is no cowl that goes on to it. For DIY, you remove the cowl by pulling it up and peeling it off, after removing all the other things on top like the filter cover etc. Then peel of the old trim piece. Clean all the remaining glue pieces and dirt from the bottom of the windshield very good so that new one will be able to adhere. Now if windshield guy put windshield glue/seal too much, it may have not left enough room for this trim piece for the bottom of the windshield to go in. Then you will need to carve out the extra windshield glue/seal from replacement. Ask me how I know.... Check the curvature of the new piece first. It may have been bent during shipment. As can be seen in the picture it has an aluminum profile that gives its shape. It needs to have slightly more curvature at the ends than the windshield bottom shape so that it helps holding when applied. Start placing the new one from the center and aligning the center mark with the windshield center mark. It should have a center mark if I remember correctly. Work towards the sides from center by pressing into the windshield bottom. Then make sure to place the other thin seal piece on the sheet metal that is right under the windshield. This one can get folded if not careful. Reuse the existing one. Then make sure you peeled of the blank piece that it came shipped and discard it from this trim. Then you position the cowl over it by aligning again center marks and push the cowl down so it goes into it. Again starting from center works better. All that said, just like the rear window bottom trim, the windshield trim also by age starts to peel off from sides. What I mean even without windshield replacement you could have had the same gap there by age. I am not sure your wind noise is caused by this. |
|
Appreciate
2
homerb0.00 |
| 11-18-2015, 12:17 AM | #3 |
|
Colonel
1007
Rep 2,108
Posts |
The part 51717180743 you mentioned is what I had referred as the cowl.
See the picture here, it shows the bottom side of it: 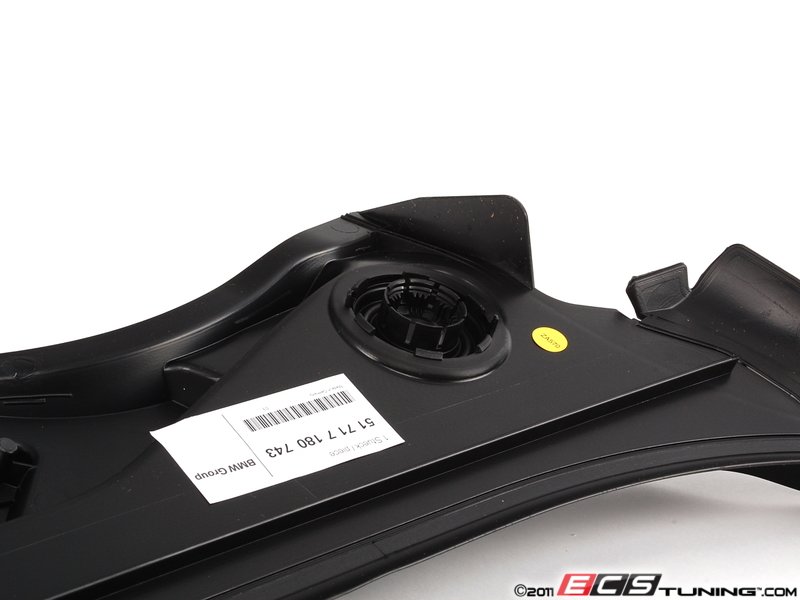 Note the straight thin section going along its length, that goes into the piece I mentioned above. Problem is that other piece, it gets glued off the windshield bottom, and so this one doesn't press on the windshield well as a result, leaving some gap. I skipped the steps to be able to get these pieces off, because I don't remember exactly. One thing I remembered after seeing the picture of this one, you will need to remove the windshield wiper arms too. There is a plastic round cap at the base of the wiper arms that cover the nut holding them down. I suggest first mark the position of the wipers on the windshield first, with tape or some marker that will wipe off later on easily. This will help you put them back in correct position. Then you pull off the plastic caps first, then undo the nut. And carefully pull the wiper arm off. It may initially not want to come off, but wiggle a bit it pops off. When putting them back on, there is a torque setting to use, I can or you can find if you search. If not using torque wrench, don't torque them much. They need just enough tightening. Before all this you need to remove the upper and lower cabin air filter covers, if these are what they are called. And before those you need to remove or disconnect and undo the cable bridge thingies that go over the engine. The lower cabin air filter cover is a bit tricky to put back in, take your time. When position right it pops in. It has hooks on the back under it that require correct angle positioning before pushing in. If forced they can break. There are two small bolts on each side on the front that holds it too. If you search you can find information and DIYs on these. Because most work done on the engine, like valve cover gasket changing, require to take them off. |
|
Appreciate
1
|
| 11-18-2015, 10:48 PM | #4 |
|
Private
 
7
Rep 88
Posts |
Just be very careful when removing the trim and reinstalling the new one. It easy to crack the windshield. Don't ask me how I know!
__________________
2015 X5 50i
|
|
Appreciate
0
|
| 01-01-2016, 04:45 PM | #6 |
|
Captain
266
Rep 952
Posts |
So I finally got around to changing my plugs and this was also a good time to look at my windshield trim at the same time.
It appears that when the windshield was replaced, the lower molding was not put back at all! The ridge on the back on my cowl trim doesn't attach to anything. While that trim is supposed to be under the bottom edge of the windshield, there is way too much adhesive stuck in there. Looks like I need to order the trim, and cut back the adhesive so that I can fit the trim piece under the bottom edge of the windshield. I'll try to post some pictures. https://plus.google.com/photos/11587...CIe-hLHd4s3TSA https://plus.google.com/photos/11587...CIe-hLHd4s3TSA 
__________________
bone stock
Last edited by robthewrench; 01-01-2016 at 09:42 PM.. |
|
Appreciate
1
|
| 07-25-2018, 12:59 PM | #7 |
|
New Member
2
Rep 11
Posts |
I am so happy to have found this thread!
I have the same problem with my 2008 E90 318d - will this part fit my car? I noticed on the site from ECS that my 318d wasn't listed? |
|
Appreciate
0
|
 |
| Bookmarks |
|
|


